#necksupport

STRETCH

Welcome to the stressful, too-many-parties, family-filled, end-of-year wrap up, glittering time of year. You know what you need to do? STRETCH! This series should take less than 20 minutes. Make sure to do the whole sequence in order for the full effect. Enjoy!

1. Breathe. Lie on your back and take a few full breaths. This stretches your insides and is an important first step to any stretching process.

2. Hamstring Stretch. Draw one knee into your chest and loop a strap (belt, long towel, scarf) around the sole of your foot. Extend your leg to the sky at an angle that allows you to keep an even pelvis and long spine. 1 minute each side.

3. Figure Four. Cross your right ankle over your left knee and bring your left leg to tabletop. Hold behind the back of your left leg and gently draw your legs towards your chest keeping your lower back long. You may like adding a gentle rock from side to side. 1 minute each side.

4. Quad Stretch. Lie on your belly with long legs. Make sure you line your self up in a straight line (not like a banana!). Bend one leg, bringing your heel towards your pelvis. Hold your ankle and direct your knee straight down. 1 min each side.
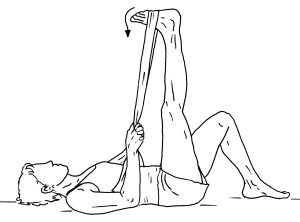
Hamstring Stretch

Hamstring Stretch

Figure Four

Figure Four

Quad Stretch

Quad Stretch

5. Hip Flexor Stretch. Stand vertically on your knees and step one foot forward into an upright lunge. Use your abdominals to lift your hip points and level your pelvis. Tuck your tail slightly and gently shift your aligned pelvis and spine forward into a stretch. 45 sec each side.

6. Straddle. Sit with your legs open to the sides like a large "V". If you cannot sit comfortably like this, sit up on a blanket or yoga blocks. Point your knees and toes up to the ceiling and have a very upright spine. If you are able, slowly tip your spine forward, hinging from your hips to move deeper into the stretch. 1 minute.
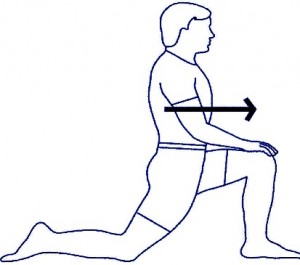
Hip Flexor Stretch

Hip Flexor Stretch

Straddle

Straddle

7. Chest. Stand clasping your hands behind your pelvis. Reach your knuckles down towards the ground as your open the center of your chest to the sky. 30 seconds, and then switch the way your fingers are crossed. Repeat!

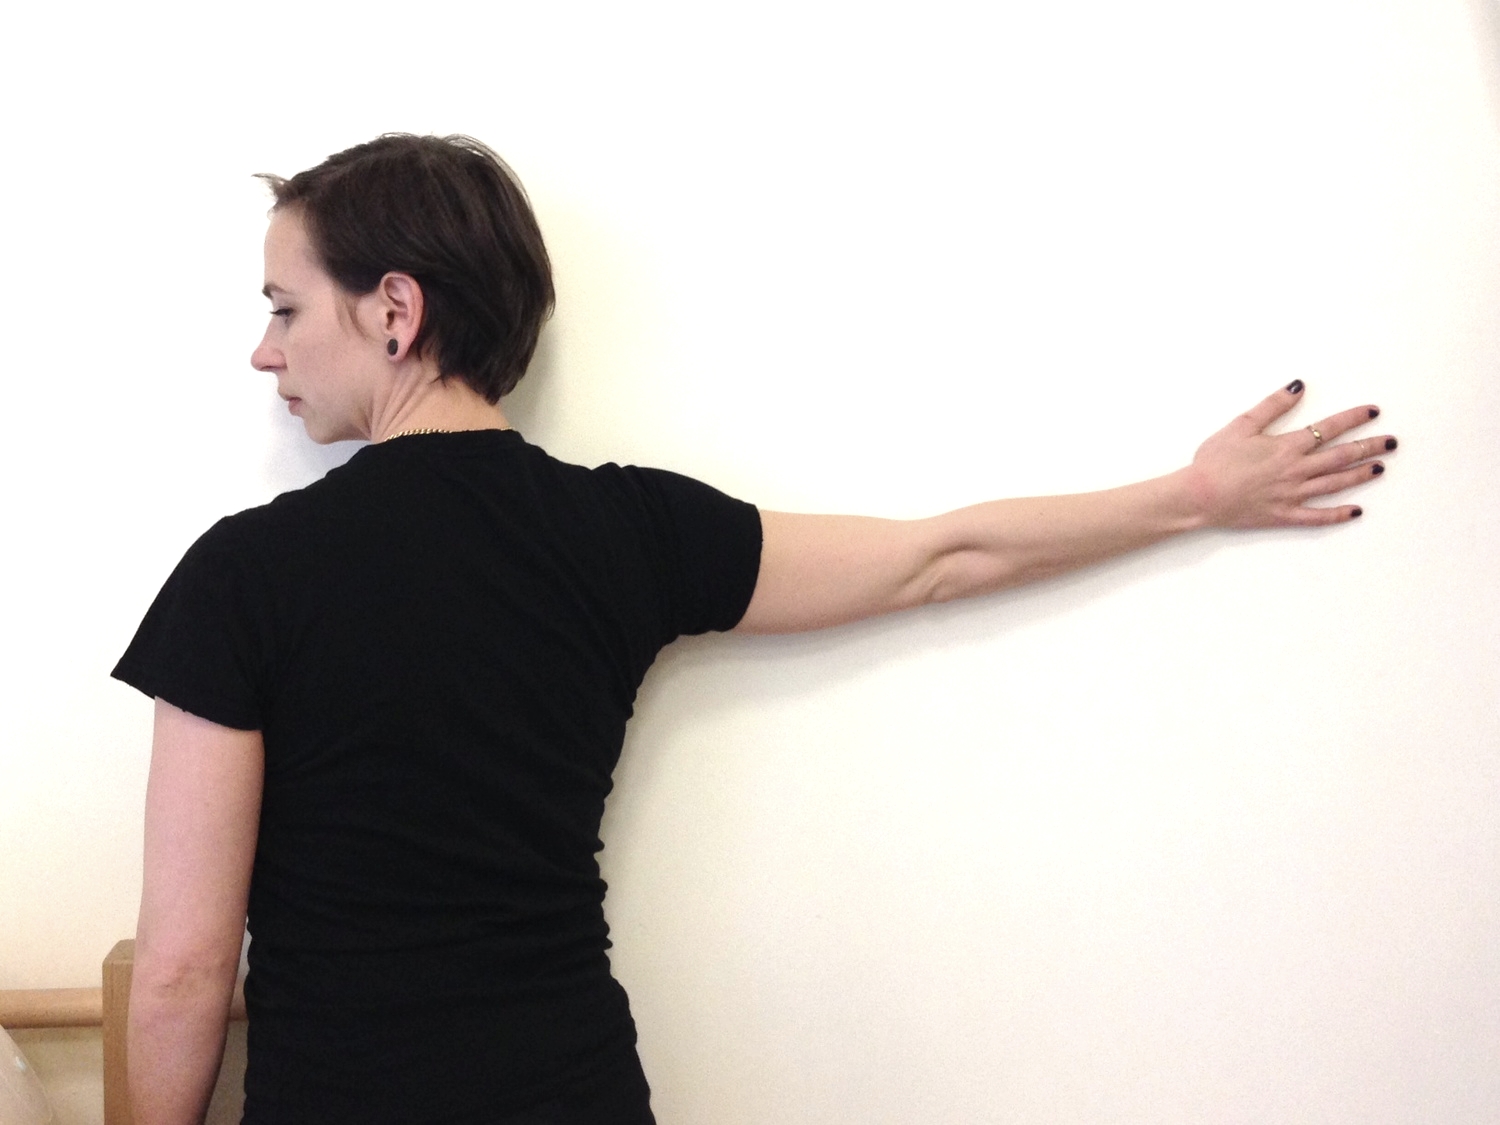
8. Neck. Here is a link to a series of neck stretches we think are fabulous for relieving neck tension. Trust us.

9. Breathe. Yes, again :).

To Massage or not to massage?


I have this knot in my neck that I think I must have had forever. I recently asked my PT about it. Would it make sense for her to massage it out? Her answer was NO (shocking?). She said that It is likely there because muscles are engaging to stabilize something that is out of whack. Hmm. So something isn't working well and it is actually a good thing that this knot is here? Yeah, kinda. If she were to massage the knot away I would be left with the instability but not necessarily the tools to change the pattern. Let's change the pattern first so the knot can go away on its own!

Here is an article from Dr. Dooley Noted that addresses this topic in an interesting and straight forward way. 

What do I do, say you? We recommend thoughtful re-patterning! In a safe environment, get really simple and clear with how you are moving. Notice what your body does and try to find other possibilities for how you might work! Pilates is a great tool for this. Pilates is simple, focuses on deep stability and highlights weaknesses and imbalances. It gives you the tools to make changes in your body. Once you get to the bottom of a pattern, you can rebuild your strength in a new and improved way!

#necksupport: Engage and Lengthen!

Use these exercises to engage the muscles that support your head and neck. These exercises all focus on extension and length. If extension is contra indicated for you- book a session and we will help you find movements that suite your body. 


Diamond arms


Lie on your abdominals with your legs out long and reaching back. Place your forehead on a towel so you can breathe. Rest your arms in a diamond shape with elbows bent at 90 degrees and your fingers almost touching over your head. This is similar to the position you have to stand in when at the airport in a scanner. Take a moment to breathe into your back ribs and feel your collar bones wide. Keep your head and elbows on the floor. Rotate your upper arm so that your forearm and palm peel off the floor in one piece. Replace that arm on the floor. Repeat on the second side. Be careful not to rotate from the elbow down in an effort to get your palm off the floor. It's not how high you lift but where it comes from that matters here. The tops of your shoulders should stay soft and your midline should stay long. 


T arms

KHTtraps.jpg


Lie on your abdominals with your legs long and reaching back. Rest your forehead on a folded towel so you can breathe. Reach your arms out into a T shape in line with your shoulders. Rotate your thumbs up toward the ceiling and your pinkys towards the floor. Curl your fingers into small fists so it looks like you are hitch hiking. Reach out through you arms and shoulders to increase your wing span. Imagine spinning your collar bones up toward the roof of your mouth. Keep this feeling of width as you float your arms out and up off the floor. Maintain the width as you lower back down. You want to feel the work low between your shoulder blades in your lower and mid traps, not in your upper traps. Your head stays on the floor the whole time. Repeat 10x only lifting as little or as much as you can keep the work targeted. 


Swan

swanj.jpg


Lie down on your abdominals with your legs long and reaching back. Place your hands underneath your forehead. Inhale to lengthen through your center line, floating your head up in line with the center of your rib cage. Exhale as you come into extension in your upper back. Think of opening through your front ribs, shifting the back of your heart forward and finding long support through your center and legs. Keep lengthening on the way back down. Try a few with your hands staying on the floor and then try a few keeping your hands connected to your forehead staying just as long even if you don't come up as high. 


For more chest opening and extension exercises check out this series from #expand

#necksupport: Release and Make Space.

Use these stretches to make some space in your neck and shoulders. Take your time, be gentle and breath. Not sure what your scalenes and legator scaps are? Click the links to learn more with our #necksupport series!

scalenestretch.jpg


scalene stretch

Find a comfortable seat or standing position in neutral spine with your feet and legs supported. Take your right hand and place it underneath your left collar bone, in line with your collar bone. Apply gentle pressure in towards your rib cage and down towards your hips using the entire length of your hand- no pokey fingers. You can stack your free hand on top for extra support if you like. Keeping your head over the center of your rib cage, side bend it away from your hands and left collar bone. Try not to jut your chin forward. Stay here for three breaths. Then gently rotate the broad edge of your left cheek and jaw towards the ceiling. Stay for three breaths. Release and repeat on the other side. 


levator scap stretch

Place one hand above your head with your elbow slightly bent. Tilt your head away from the arm that is up and rotate it to look down towards the ground. Breathe and try to allow your shoulder to release down your back. Repeat on both sides.


pec stretch

Face the wall and extend your arm straight out to the side.  Place your hand on the wall. Rotate your body away from your hand without rotating the head of your shoulder forward towards the wall or down towards the floor. Turn your head away. Try this with your arm a little bit higher than shoulder level. Repeat on both sides. 

If you want a dynamic pec stretch, try this one!


Swimmerstretch.jpg


Swimmers stretch

Sit or stand comfortably in your neutral spine. Bring your right arm up in front of your chest with your elbow bent to 90 degrees. Wrap your left elbow under your right and try to place your left fingers in your right palm. Your forearms will be intertwined and your palms facing each other. If the second step is unavailable, you can hold a strap between your hands or press the backs of your forearms and palms together. Keeping this arm posture, drop your shoulders down your back and lift your elbows. If you don't feel a stretch, move your hands away from your face without lifting your shoulders. Deepen your breath and direct it between your shoulder blades. (Optional: take a head roll in each direction) Stay here for a few deep, slow rounds of breath and repeat on the other side. 

Check out more at-home exercises with #moveit!

levator scapulae

Oh Levator Scapulae, how I love to hate you.


The Levator(elevate) Scapulae(shoulder blade) runs from the top inner corner of the shoulder blade up to your first four vertebrae in your cervical spine (neck). The levator scap is underneath both the Trapezius and SCM. (click here or here if you don't know what those are)

This image is from Wikipedia 

This image is from Wikipedia 

The Levator does a couple of actions. It works to elevate the inner corner of the scapulae, which in turn downwardly rates the scapulae (does that make your brain hurt?). Basically, it pulls that inner corner up towards the neck and makes your shoulder socket spin down towards the floor. If the shoulder blade is fixed, the Levators can work to either bend the spine to one side or another, compress the spine on one side or the other, OR compress both sides which could contribute to forward head (and lots of neck aches).

Lucky for you, we will be posting a #moveit post next week to teach you some ways to help release your Levator Scapulae. Stay tuned!

Sternocleidomastoid - Say what?

Let's break that down! 

Sterno = Sternum- aka chest plate

Cleido = Clavicle or clavicular- aka collar bones

Mastoid = having to do with the Mastoid process- aka the landmark on your temporal bone, behind your ear 

SCM for short! The sternocliedomastoid is a neck muscle that is easily visible when you turn your head to look over one shoulder. You have two, one on each side of the front of your neck. 

What does it do? Primarily the SCM acts in moving the head and cervical spine. The SCM moves the head during specific angles of side bending and rotation, and when both SCMs contract together they create extension of the head (turning your face to the ceiling) and accentuate the curvature in the vertebrae of your neck (cervical vertebrae). However, when the head is fixed or held still the SCM elevates the sternum and clavicle assisting in respiration. You might make your neck look like a lizard sometimes on purpose- this is flaring your SCMs with a fixed skull. 

Image:Gray385.png modified by Uwe Gille - Image:Gray385.png

Image:Gray385.png modified by Uwe Gille - Image:Gray385.png

Let's look at where it attaches to better understand how it affects our #necksupport. Your SCMs have two heads that originate on each side of the top of the sternum and along the edge of your clavicles close to the sternum. From their origins they sweep on a diagonal line across your neck, without attaching to any vertebrae to insert behind your ear. So these puppies connect your shoulder girdle and rib cage to your head. 

Forward head posture is a common problem in our desk-driven and text-fueled society. In forward head posture, the SCMs can't perform their movement responsibilities because our alignment is so out of whack. In this poor alignment the side bending and rotating, that the SCMs usually take care of, gets outsourced to other groups like our traps! Yikes! All of this reorganizing and compensating leads to compromised positions, stress and imbalance on the structures of our neck, spine and ribs that can lead to long term issues. Are you reading this on a screen? Where's your head? :)  Just looking out for you! Stay tuned for more on neck anatomy and posture as well as information to understand your spine! 

See you in the studio! -Shorty

Scalenes

Hello! Shorty here to give you some #necksupport. Today's topic is a group of muscles called the scalenes. There are three--anterior, medium and posterior OR front, middle and back. They attach to the transverse processes of your vertebrae (the little arms that stick out to the sides) and run down along your neck, connecting to your first and second ribs.

This is looking straight on like you were looking in the mirror.  The bright red muscles are the scalenes. Image from Wikipedia 

This is looking straight on like you were looking in the mirror.  The bright red muscles are the scalenes. Image from Wikipedia 

Why are these things important? Well, because they attach to both your neck and your ribcage. If they get tight they can cause compression in your neck and do nasty things like shift, tilt or rotate your head. They can also inhibit breathing in the upper part of your chest if they are very tight and always engaged (they should slightly assist your upper ribs moving up and down with your breathing).  

There are little places in each vertebral (spinal) segment where nerves emerge and continue into part of your body. Some of the nerves that feed into your shoulders, arms and hands move through and intertwine with the scalenes. If they are tight, they can inhibit or irritate these nerves from moving smoothly. Nobody wants a cramped nerve, know what I mean?

This image is looking at someone's right shoulder. Look closely at the text. The yellow part is the brachial plexus, a bundle of nerves. It is sandwiched between the anterior and medial scalene muscles and continues underneath the collar bone. Image…

This image is looking at someone's right shoulder. Look closely at the text. The yellow part is the brachial plexus, a bundle of nerves. It is sandwiched between the anterior and medial scalene muscles and continues underneath the collar bone. Image from Gray's Anatomy.

Stay tuned this month for some ways to get in touch with, stretch, and breath ease into these muscles.

Texting got you down?

There has been a bit of press about the effects of texting circulating lately. Here is an article from the Atlantic that briefly describes the effect of texting on your neck. This is becoming a problem for so many of us. We sit, clutching our phones, head bowed completely forward. This posture has severe ramifications for the head and neck, as well as all of the nerves that come out of the cervical spine and continue out through the arms.  

This month's series, #necksupport, will explore the musculature of the neck and introduce some at-home tips to help strengthen, lengthen and balance those muscles. Stay tuned for #shortyswan and #moveit posts throughout the month!